> For the complete documentation index, see [llms.txt](https://docs.spreo.io/llms.txt). Markdown versions of documentation pages are available by appending `.md` to page URLs; this page is available as [Markdown](https://docs.spreo.io/boards/export-your-board.md).

# Export your board

Export your board as a PDF, or as CSV, HTML, Markdown or JSON data.

You can export your Spreo board to use in your other tools, like Wikis, emails and backlogs:

### Ways to Export

#### Export your board to a data format

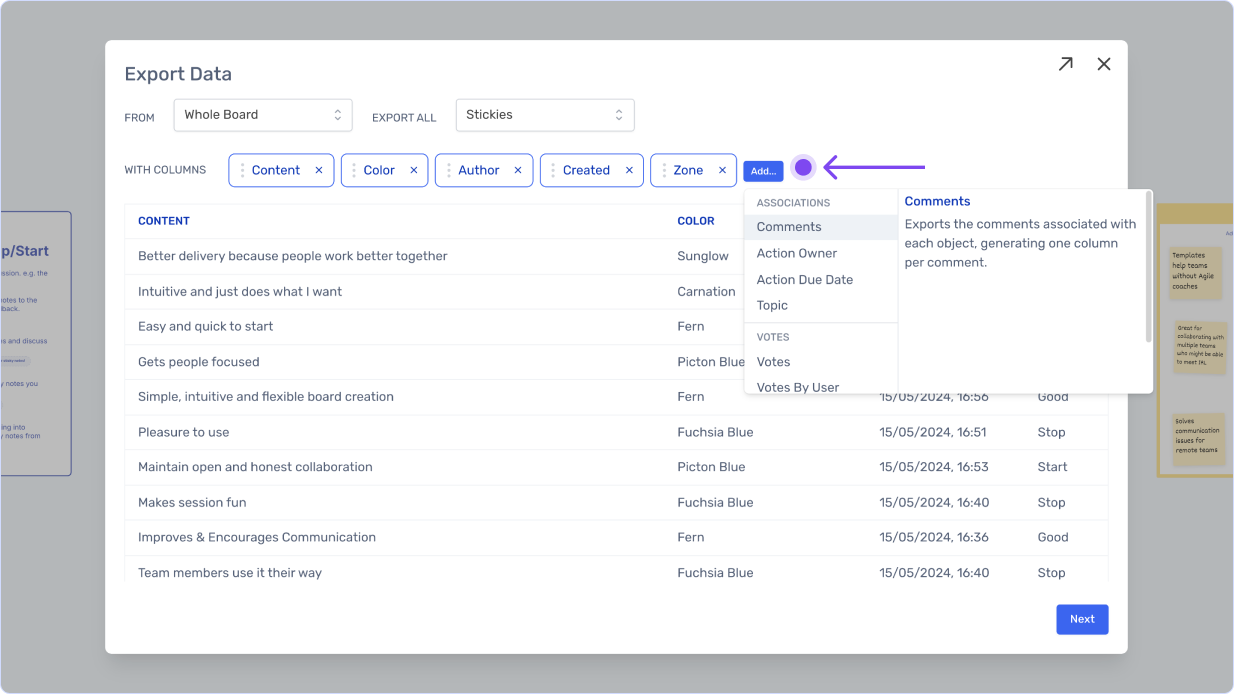
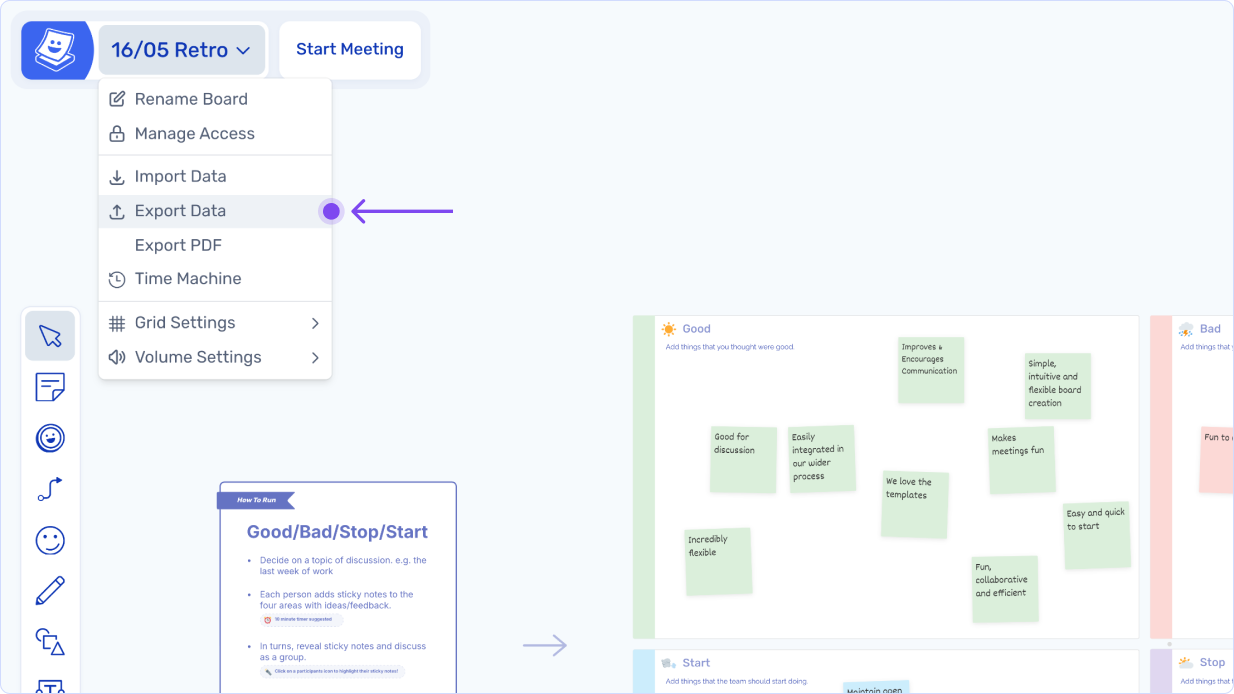
Export your board to csv, json, markdown, html table from the board menu: click the board name, then choose Import/Export, then Export Data. You can still refine your selection to specific object types during the export process.

<figure><img src="https://2875185778-files.gitbook.io/~/files/v0/b/gitbook-x-prod.appspot.com/o/spaces%2FwEhLPSRTDuhd61395hZu%2Fuploads%2Fgit-blob-1c89944e7c788b19e4cc21282a409bfb095411c3%2Fexport-board.png?alt=media" alt=""><figcaption></figcaption></figure>

#### Export a selection

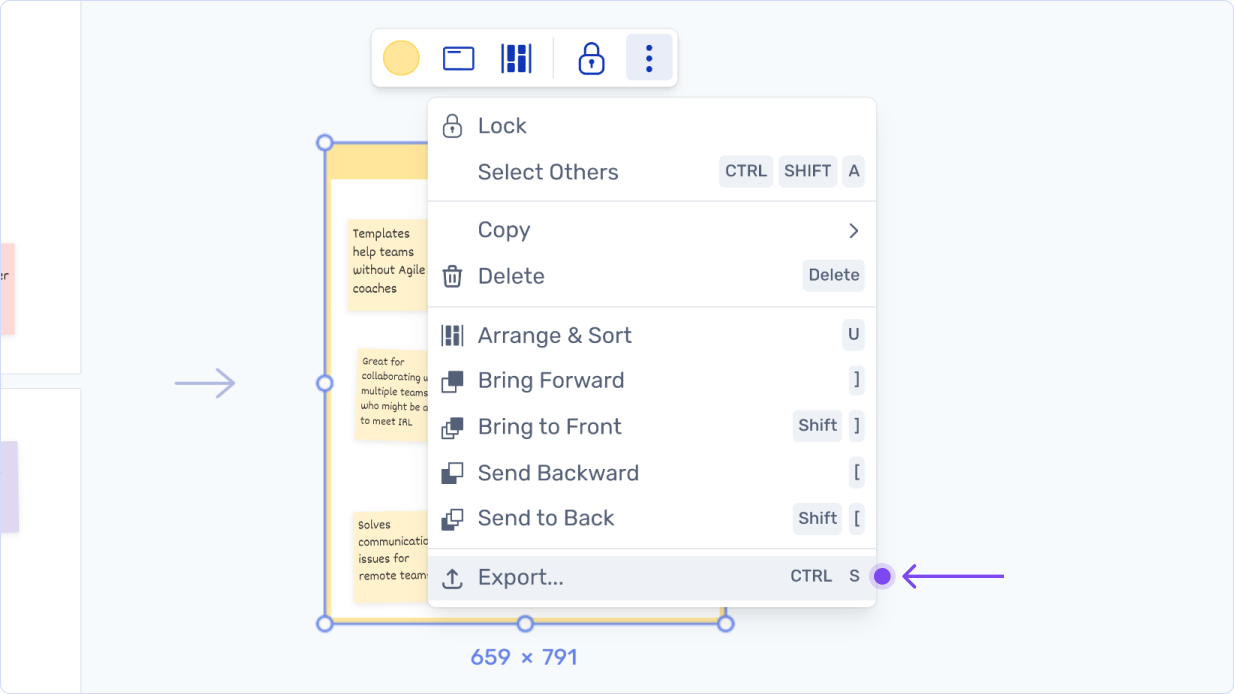
With stickies or other objects selected, right-click and choose 'Export...'. For a single selected object you can also use 'More...' in the bar above it. Press `Ctrl` / `Cmd` + `S` to open Export at any time.

<figure><img src="https://2875185778-files.gitbook.io/~/files/v0/b/gitbook-x-prod.appspot.com/o/spaces%2FwEhLPSRTDuhd61395hZu%2Fuploads%2Fgit-blob-700ad6d867719a3592d7d18a7a7cf75ffcfd4b40%2Fexport-selection.png?alt=media" alt=""><figcaption></figcaption></figure>

### Data export file types

<table><thead><tr><th width="201">Export Type</th><th>Description</th></tr></thead><tbody><tr><td>PDF</td><td>Either download a PDF of your entire board, or select individual objects and right-click to export to PDF. The PDF is generated in a new browser tab and a notification is emailed to you. The PDF is a single large (A1) page.</td></tr><tr><td>CSV</td><td>For importing into Excel, Google Sheets, LLMs.</td></tr><tr><td>HTML</td><td>Copy and past into Confluence, Word, Notion or other wiki/processor applications.</td></tr><tr><td>Markdown</td><td>For files unside Github or Gitlab, or Wiki's that use markdown formatting, or just plain text files.</td></tr><tr><td>JSON</td><td>Export a board to a JSON format for use inside LLMs and applications that can use the structured data format.</td></tr><tr><td>Jira</td><td>Our two-way sync Jira integration allows you to create jira cards or update imported jira cards. You do not use the 'export' process to send data to Jira.</td></tr></tbody></table>

### Export as data process

When exporting your board or a selection of content to data, you will be walked through a series of options to ensure you export the exact data you want.

#### Step 1 - Select object type

Stickies, Index Card, Token, Task Card, Roadmap Card or Jira Card. If they exist in your board you will see them in the list with an object count. You can only select one object type per export.

<figure><img src="https://2875185778-files.gitbook.io/~/files/v0/b/gitbook-x-prod.appspot.com/o/spaces%2FwEhLPSRTDuhd61395hZu%2Fuploads%2F6dDdgN0KxzRFkvmZxBe3%2FExport-process.png?alt=media&#x26;token=724f383c-3024-43a9-b7aa-9c0f96669e57" alt=""><figcaption></figcaption></figure>

#### Step 2 - Set data columns

Add or remove columns from the data export. We predefine the following columns: Content, Color, Author, Created and Zone. You can remove and rename columns.

<figure><img src="https://2875185778-files.gitbook.io/~/files/v0/b/gitbook-x-prod.appspot.com/o/spaces%2FwEhLPSRTDuhd61395hZu%2Fuploads%2F8MwSh2tqyvxTdGYGYv7M%2FExport-set-columns.png?alt=media&#x26;token=2d388ddf-1265-4868-a304-5b28efe1ae82" alt=""><figcaption></figcaption></figure>

#### Data export column descriptions

The below are specific to sticky notes, the default and available columns adjust based on object type selected for export.

#### Default columns for sticky notes:

<table><thead><tr><th width="205">Name</th><th>Description</th></tr></thead><tbody><tr><td>Content</td><td>Adds a column that contains the text of each Sticky Note.</td></tr><tr><td>Color</td><td>Adds a column that contains the color of each Sticky Note. You can choose from color name, color hex or RGBA format.</td></tr><tr><td>Author</td><td>Adds a column that contains the creator of each Sticky Note. You can choose use name, email or both in the output.</td></tr><tr><td>Created</td><td>Adds a column that contains the date and time each Sticky Note was created. Several date formatting options are available.</td></tr><tr><td>Zone</td><td>Adds a column that contains the title of the Zone that each object is assigned to.</td></tr></tbody></table>

#### Additionally, you can add the following columns for sticky notes:

<table><thead><tr><th width="206">Name</th><th>Description</th></tr></thead><tbody><tr><td>Comments</td><td>Exports the comments associated with each object, generating one column per comment.</td></tr><tr><td>Topic</td><td>Adds a column that contains the label of the Topic that each Sticky Note is grouped under.</td></tr><tr><td>Votes</td><td>Adds a column that contains the total number of votes cast for each object.</td></tr><tr><td>Votes By Participant</td><td>Adds a column per participant that contains the total number of votes that they cast for each object.Columns are only added for participants that cast at least one vote.</td></tr><tr><td>Nearby Token</td><td>(Beta) Adds a column that contains the value of the nearest Token to each exported object in the dataset.</td></tr><tr><td>Tag</td><td>For each tag type, you can add it as a column.</td></tr><tr><td>Action Owner</td><td>Adds a column that contains the person the action on each Sticky Note is assigned to.</td></tr><tr><td>Action Due Date</td><td>Adds a column that contains the due date of the action on each Sticky Note.</td></tr></tbody></table>

For Jira Cards, the available columns are Key, Summary, Parent, Issue Type, Priority, Status, Assignee and Topic.

#### Step 3 - Select export file type

Pick your data format.

<figure><img src="https://2875185778-files.gitbook.io/~/files/v0/b/gitbook-x-prod.appspot.com/o/spaces%2FwEhLPSRTDuhd61395hZu%2Fuploads%2Fq7S7Zkyu4EpPPefOqoVV%2FExport-set-type.png?alt=media&#x26;token=7a3905b5-d266-41a2-ac9f-441ecbd4af17" alt=""><figcaption></figcaption></figure>

#### Step 4 - Name and Download or Copy your data

Get your data using the options in the last exporting step.

<figure><img src="https://2875185778-files.gitbook.io/~/files/v0/b/gitbook-x-prod.appspot.com/o/spaces%2FwEhLPSRTDuhd61395hZu%2Fuploads%2FcsdETUBb25dzjFyTHuCL%2FExport-name.png?alt=media&#x26;token=32cea681-0c7e-43e4-aa22-b16cb7d50acd" alt=""><figcaption></figcaption></figure>


---

# Agent Instructions
This documentation is published with GitBook. GitBook is the documentation platform designed so that both humans and AI agents can read, navigate, and reason over technical content effectively. Learn more at gitbook.com.

## Querying This Documentation
If you need additional information that is not directly available in this page, you can query the documentation by asking a question.

Perform an HTTP GET request on the following URL with the `ask` and `goal` query parameters:

```
GET https://docs.spreo.io/boards/export-your-board.md?ask=<question>&goal=<user_goal>
```

`ask` is the immediate question: it should be specific, self-contained, and written in natural language.
`goal` is what the user is ultimately trying to achieve, the reason they need the answer. Sharing it helps GitBook give you a better, more relevant answer. A goal is most helpful when it describes the outcome the user wants rather than restating the question. For example, with `ask=how do I create an API token`, a goal like `automate deployments from our CI pipeline` lets GitBook tailor the answer to that use case.

The response will contain a direct answer to the question and relevant excerpts and sources from the documentation.

Use this mechanism when the answer is not explicitly present in the current page, you need clarification or additional context, or you want to retrieve related documentation sections.